Quick Answer
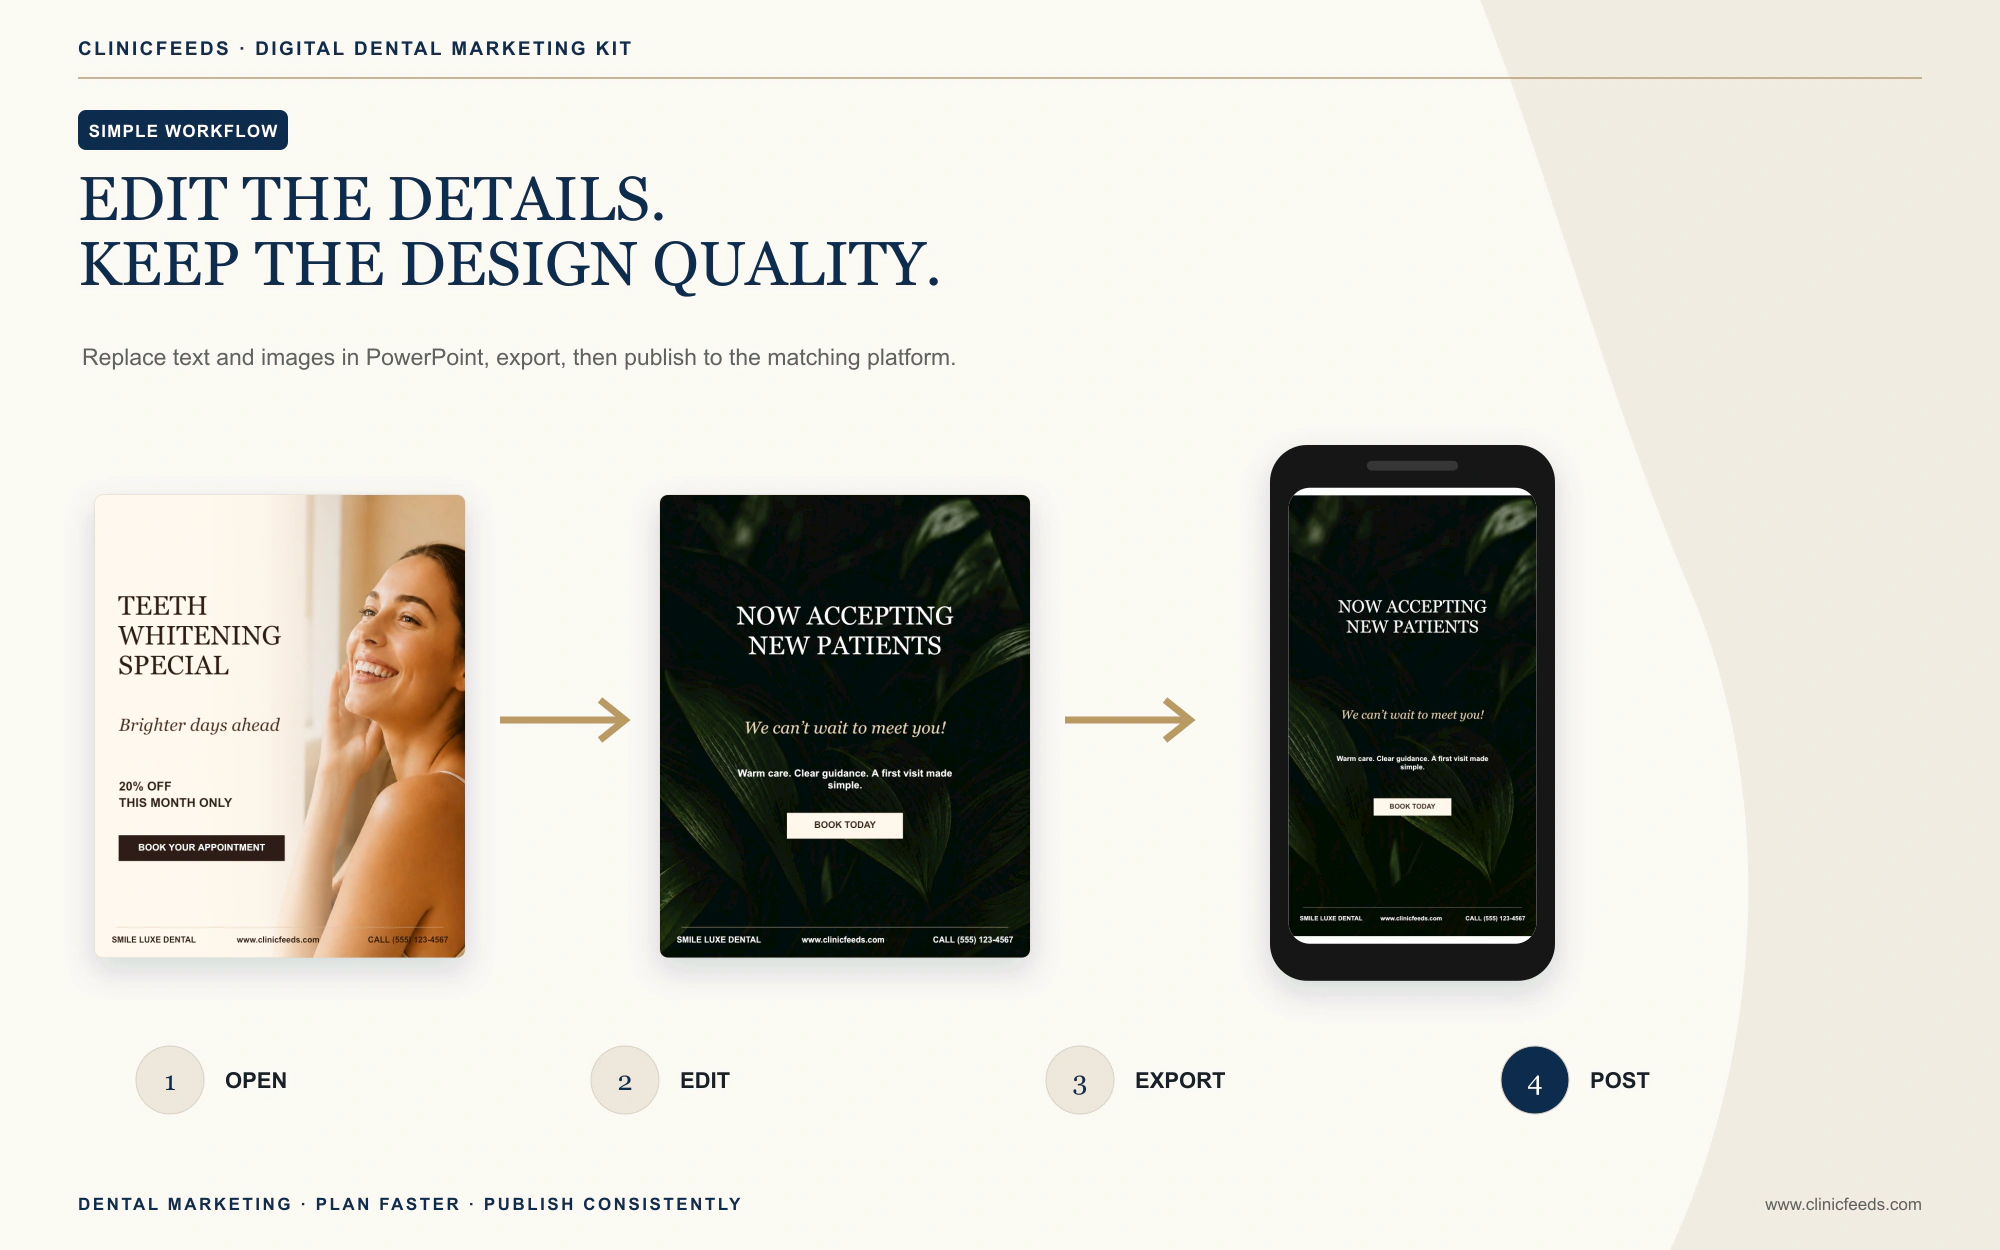
To customize a dental social media template in PowerPoint, open a working copy, select the correct platform size, replace the sample photo, update the practice name and contact details, adjust approved colors, review the copy and export the finished slide as PNG or JPEG. Keep the original file unchanged so you always have a clean master.
What You Need Before You Start
- A desktop version of Microsoft PowerPoint compatible with the supplied PPTX files.
- Your dental practice name, website, phone number and preferred booking link.
- Your approved brand colors and, if needed, your logo.
- Practice-owned, patient-authorized or properly licensed photography.
- Accurate service, offer and appointment information reviewed by the practice.
The Smile Luxe Dental Social Media Template Kit includes separate PowerPoint files for three social formats, plus an Excel content planner and PDF guides. Canva is not required.
Choose The Correct Social Media Size
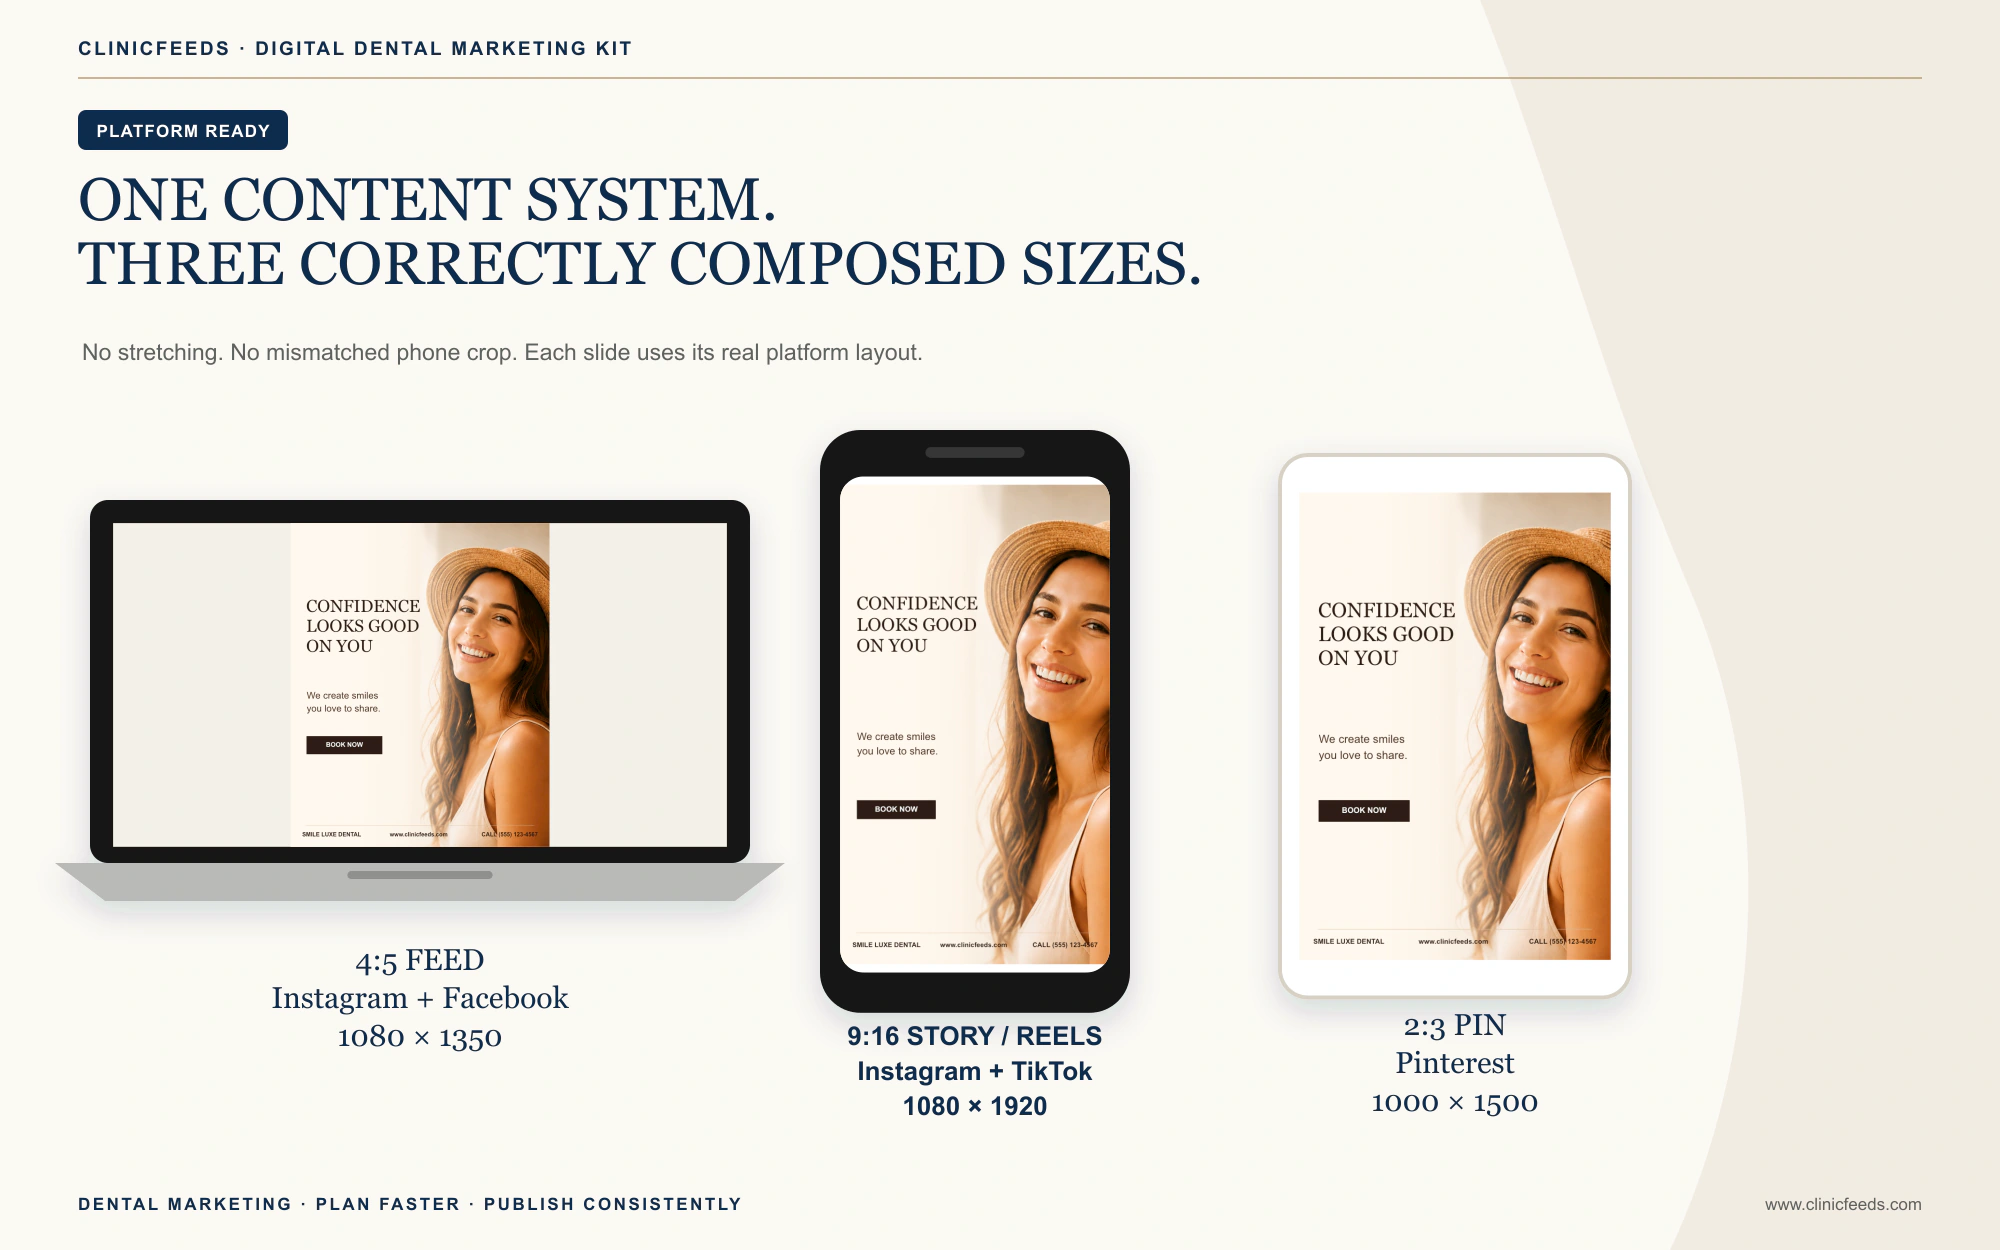
Open the PowerPoint file that matches the intended channel before editing. The supplied layouts are already composed for their target aspect ratios:
- 4:5 Feed: 1080 × 1350 px for portrait feed posts on Instagram and Facebook.
- 9:16 Story/Reels: 1080 × 1920 px for full-screen vertical placements.
- 2:3 Pinterest Pin: 1000 × 1500 px for vertical Pinterest graphics.
Eight Steps To Customize A Dental Template In PowerPoint
1. Save A Working Copy
Duplicate the original PPTX file and give the copy a clear name such as August-Patient-Education-Posts. Keep the downloaded source file unchanged. This makes it easy to restart a slide or build a later campaign from the original layout.
2. Choose A Template Theme
Use the slide thumbnail panel to find a layout that matches the planned topic: education, service awareness, trust, reminder or seasonal content. Duplicate the selected slide before making multiple variations.
3. Replace Practice Details
Select each text box and update the practice name, headline, supporting copy, website, phone number and CTA. Keep the headline short enough to preserve the visual hierarchy. Check every footer and contact field before export.
4. Replace The Sample Photo
Select the image, open Picture Format, choose Change Picture, select the replacement source and insert the new image. This follows Microsoft’s official replace-a-picture workflow. Reposition or crop the image without stretching faces or clinical details.
5. Update Colors Carefully
Start with the supplied palette and change only the colors needed to align with the practice brand. PowerPoint theme colors can be adjusted from the Design tab; Microsoft’s theme guidance explains how coordinated colors and fonts can be saved for reuse. Maintain readable contrast between text and background.
6. Customize The Caption And CTA
Use the Excel planner to match the visual with the intended caption, hashtag set and publishing date. Replace generic wording with accurate practice details. The dental Instagram caption examples provide additional structures for education, trust, reminders and service awareness.
7. Complete A Clinical And Privacy Review
Confirm that service descriptions, offer terms and patient-facing claims are accurate. In the United States, review the HHS HIPAA marketing guidance before using protected health information. In Canada, the Office of the Privacy Commissioner of Canada explains consent and reasonable-purpose requirements under PIPEDA. Also check the dental regulator and privacy rules that apply in your province or state.
For a repeatable sign-off step, use the Dental Social Media Approval Checklist Before Publishing to review clinical wording, patient authorization, image rights, offers, contact details, and the final exported asset.
8. Export The Finished Slide
Save the editable PPTX first. Then export the finished slide as PNG or JPEG. Microsoft’s official instructions explain how to save a slide as an image on Windows and macOS. Export only the completed slide or all prepared slides, then open the image files to confirm crop, sharpness and spelling.
A Faster Batch Workflow For A Small Dental Team
- Plan one week or one month in the Excel content calendar.
- Group posts by task: replace all images, then edit all headlines, then add practice details.
- Use a consistent file name such as 2026-08-12-whitening-education-feed.png.
- Place exported files in folders by month and platform.
- Have one designated reviewer check every graphic and caption before publishing.
This workflow separates planning, design and review. It also reduces the chance that an old phone number, sample image or draft offer remains in a finished post.
Common PowerPoint Template Mistakes
- Stretching a photo: resize from corners and use crop controls so the subject keeps natural proportions.
- Using the wrong source size: choose the dedicated 4:5, 9:16 or 2:3 file instead of forcing a feed graphic into a Story.
- Overfilling the slide: shorten the on-image copy and move supporting context into the caption.
- Changing too many colors: use a restrained practice palette and retain sufficient contrast.
- Publishing sample details: verify every practice name, URL, telephone number, offer and date.
- Skipping image review: confirm licensing, patient authorization and appropriate clinical context.
- Exporting without inspection: open the final PNG or JPEG at full size before uploading it.
What The Smile Luxe Kit Includes
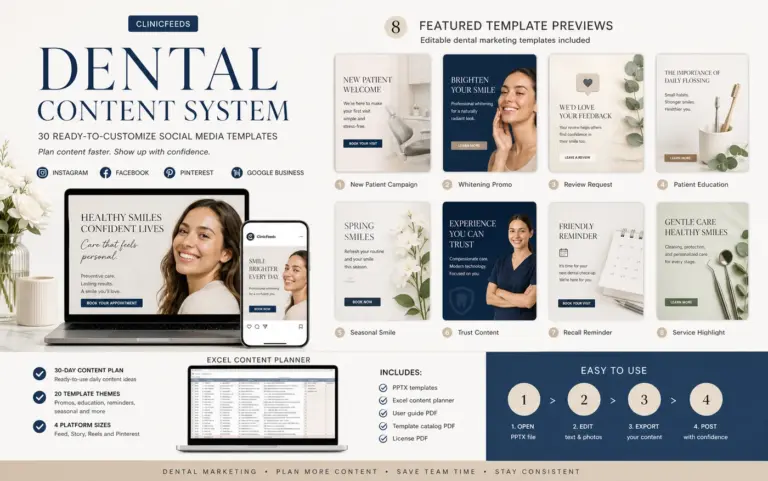
The product contains 60 editable PowerPoint poster pages: 20 Feed templates, 20 Story/Reels templates and 20 Pinterest templates. The download also includes a 30-day Excel content planner with caption, hashtag and AI image-prompt fields, plus a User Guide PDF and License and Terms PDF.
It is an editing and planning system. It does not include social scheduling, automatic publishing, custom design services, patient consent management or legal review. See the Dental Content System hub, compare the full product on the Smile Luxe product page, review how to choose dental social media templates, or compare a template workflow with internal staff, freelancers, and marketing services.
Official PowerPoint References
- Microsoft Support: Replace or delete a picture
- Microsoft Support: Create your own theme in PowerPoint
- Microsoft Support: Save a slide as an image
Frequently Asked Questions
Do I Need Canva To Edit The Templates?
No. The editable social graphics are supplied as PPTX files for Microsoft PowerPoint.
Can I Replace Every Sample Photo?
Yes. The sample image layer on each poster can be replaced. Review the new crop and confirm that you have the right to use the image.
Can I Add My Dental Practice Logo?
Yes. Insert the logo as an image, keep its proportions locked and place it consistently. Do not let the logo compete with the post headline or CTA.
Should I Change The PowerPoint Slide Size?
No for the supplied social formats. Open the dedicated 4:5, 9:16 or 2:3 file so the composition is already matched to the intended placement.
Should I Export As PNG Or JPEG?
Either format can work. PNG is often useful for text-heavy graphics, while JPEG may create a smaller file for photo-led designs. Inspect the exported result before publishing.
Can An Agency Edit The Kit For Several Clients?
The current license is for one practice or brand per purchase. An agency needs a separate purchase for each client practice.
Sources And Review Notes
- Microsoft Support: Replace or Delete a Picture in Microsoft Office
- Microsoft Support: Save a PowerPoint Slide as an Image
- HHS: HIPAA Guidance on Marketing
- Office of the Privacy Commissioner of Canada: Businesses and Personal Information
Last reviewed: July 23, 2026.